Is your Mercury outboard motor leaking oil behind the propeller? Noticing milky gear oil or unusual vibrations during your ride? These are signs that your prop shaft seal might be failing, and ignoring this issue could lead to serious damage to your lower unit. If so, it’s time to consider a Mercury prop shaft seal replacement to avoid costly repairs down the line.
Maintaining a healthy lower unit seal is essential for protecting your Mercury outboard engine, whether it’s a 25HP Tracker, a 40HP four-stroke, or a 200 Verado. It ensures smooth performance and extends engine life.
Replace a Mercury prop shaft seal by removing the propeller, draining the gearcase oil, and extracting the old seal using a seal puller. Use marine grease and follow the torque specs from the service manual for proper sealing.
This guide will walk you through the Mercury prop shaft seal step-by-step. From identifying symptoms to choosing the right seal kits, and from required tools to expert tips, you’ll find everything you need in one place.
Therefore, let’s get started!
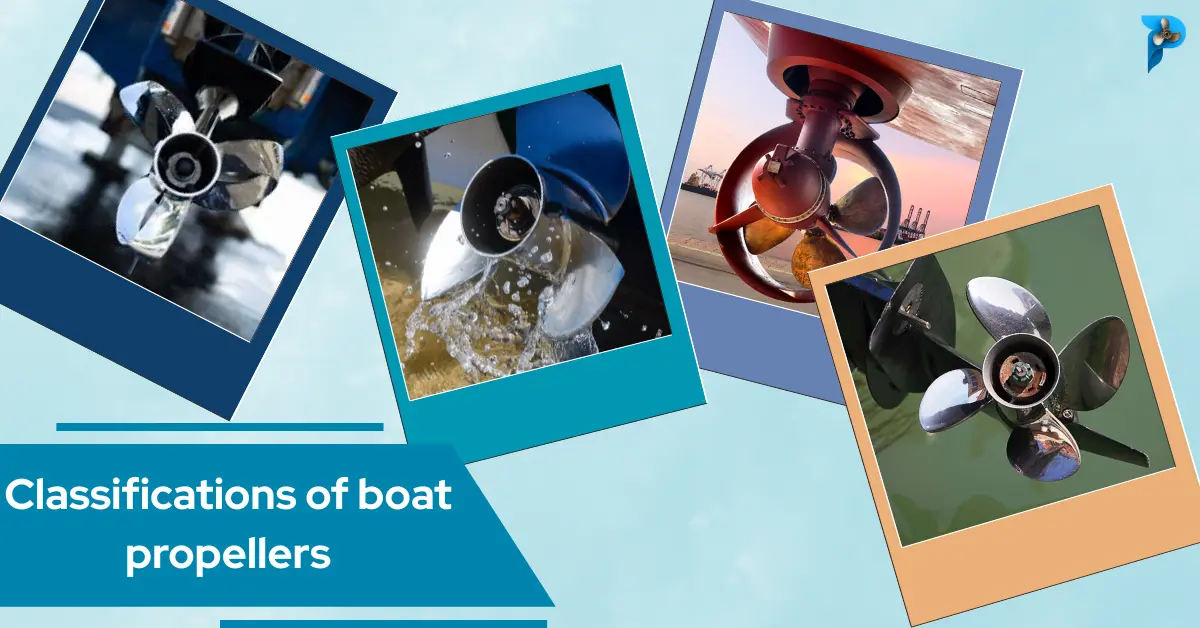
What Is a Prop Shaft Seal?
The prop shaft seal, tucked inside the lower unit of your outboard, quietly protects your engine’s most valuable internal parts.
Understanding the Prop Shaft
The propeller shaft, or prop shaft, is a spinning rod that connects your boat’s engine to the propeller. It transfers engine power to the prop and helps the boat push forward. It’s a key part of how your boat moves.
This shaft runs directly through the lower unit, the submerged part of your Mercury engine, which holds important gears and lubrication that keep everything running smoothly.
The prop shaft seal is a round rubber ring placed around the propeller shaft, tucked inside the lower unit’s gearcase.
It creates a snug, water-resistant seal that serves two main purposes: keeping water out and retaining gear oil inside.
This seal is your first line of defense against water intrusion, which can cause internal corrosion, foamy or milky gear oil, and major lower unit damage if left unchecked.
The prop shaft seal teams up with other seals in the lower unit, like the driveshaft and shift shaft seals, to shield your Mercury outboard’s internal parts.
When even one of these seals gets worn or damaged, it can put the whole lower unit at risk.
Why It’s So Important?
Because your prop shaft is constantly rotating and exposed to underwater debris, vibration, and heat, its seal naturally wears down over time.
Ignoring a failing seal can lead to gear oil leaks, increased friction, and total gearcase failure, all of which are far more expensive to repair than a simple seal replacement.
That’s why it’s crucial to regularly inspect and replace your Mercury prop shaft seal when needed, whether you’re using a small 25HP motor or a high-performance 200 Verado. A small leak can lead to big trouble if ignored.
Why Replace the Prop Shaft Seal?
The prop shaft seal in your Mercury outboard may be small, but its role is anything but minor. This crucial seal is constantly exposed to high levels of friction, heat, water pressure, and marine debris, and over time, those forces take a toll.
When the seal starts to degrade, it can no longer maintain the tight barrier between your gearcase and the outside environment.
At that point, two serious problems arise: water starts seeping into the lower unit, and gear oil begins to leak out. Neither is something you want.
Once water intrusion begins, it doesn’t take long for damage to set in. Internals like gears, bearings, and shafts begin to corrode.
Meanwhile, the loss of gear oil causes increased friction and heat, accelerating wear inside the lower unit. Eventually, this can lead to gearcase failure.
That’s why timely Mercury prop shaft seal replacement is so important. It’s one of the most cost-effective ways to extend the life of your outboard motor.
Signs of a Failing Prop Shaft Seal

A failing prop shaft seal can lead to gearcase damage, performance loss, or worse, complete lower unit failure.
Here are the most common signs your Mercury prop shaft seal needs replacement.
1. Oil leaking from behind the prop
If you notice dark, greasy residue around the propeller hub, your lower unit seal may be letting oil escape.
2. Milky or gray gear oil
When draining your lower unit, if the oil looks cloudy or off-color, water has likely entered the gearcase, a major indicator of seal failure.
3. Unexplained loss of gear lube
If you’re losing oil but can’t see any external leaks, it’s likely seeping out through a compromised seal while the motor is running.
4. Grinding noises or gear slippage
As lubrication decreases, you may hear abnormal sounds from the lower unit or feel the gears slipping during throttle changes.
5. Shifting becomes difficult
Water in the gear oil or friction from insufficient lubrication can lead to hesitation or stiffness while shifting gears.
Tools & Materials Needed for Mercury Prop Shaft Seal Replacement
Here’s a list of essentials, each paired with reliable options that professional marine mechanics recommend.
Essential Tools
1. Slide hammer or bearing carrier puller
A good slide hammer usefully extracts the bearing carrier without damaging internal parts. A top-rated choice is the OTC 5 lb Slide Hammer Assembly, praised for its durability and performance.
2. Flathead screwdriver or seal pick
A seal pick set like NEIKO O-Ring Pick Set helps remove seals without scratching the shaft or bore.
3. Torque wrench
Torque wrenches like the EPAuto Torque Wrench are Necessary for reassembling bolts and nuts to the manufacturer’s torque specifications. They ensure proper sealing and mechanical integrity.
4. Rubber mallet or seal installer
Helps seat new seals smoothly into the bearing carrier without deformation. Orion Motor Tech Bearing Press Kit is a good option.
Supplies
1. OEM or aftermarket seal kit
An exact-fit kit like the REPLACEMENTKITS.COM Inner & Outer Prop Shaft Seal Set ensures you have the correct seals for your engine. Professionals often recommend these kits for their quality and precise sizing.
2. Marine grease
Proper lubrication is key during seal installation. Popular, reliable choices include Star Brite Trailer Wheel Bearing Marine Grease, praised for its saltwater resistance.
3. Fresh lower unit gear oil
Refill the gearcase with the manufacturer-approved lube (usually Mercury Quicksilver 75W-80). Make sure to have at least two quarts on hand.
4. Clean rags, nitrile gloves, and an oil drain container
Essential for messy jobs, especially when removing old seals and draining contaminated oil.
Read Also: Best Prop for Mercury 150 4-Stroke Engine
Step-by-Step Mercury Prop Shaft Seal Replacement Process

With a clear step-by-step process, you can confidently tackle this essential maintenance task. Follow this guide carefully to avoid costly leaks and gearcase damage.
Step 1: Prepare the Lower Unit
Before disassembly, shift your Mercury outboard engine into neutral to prevent the gears from engaging. Then, remove the propeller by loosening the nut and carefully sliding it off the shaft.
Next, drain the lower unit gear oil completely. This step prevents contamination and keeps the workspace clean.
You can use a specialized marine oil drain pan like the LUMAX Black Drainmaster Pan and Waste Storage to catch old oil efficiently without spills.
Step 2: Remove the Bearing Carrier
Locate and remove all bolts securing the bearing carrier. This assembly holds the prop shaft and seals, so handle it with care.
To extract the bearing carrier, use a slide hammer or bearing carrier puller, a tool designed for smooth removal without damaging internal components.
The OTC 5 lb Slide Hammer Kit is a popular choice among boat mechanics.
Tap gently and avoid forcing the carrier out; forcing can damage the housing or shaft.
Step 3: Remove the Prop Shaft (If Needed)
Once the bearing carrier is out, carefully slide the prop shaft free. Inspect the shaft closely for any signs of wear, grooves, or corrosion.
A worn shaft can prevent the new seals from seating properly and may require professional machining or replacement.
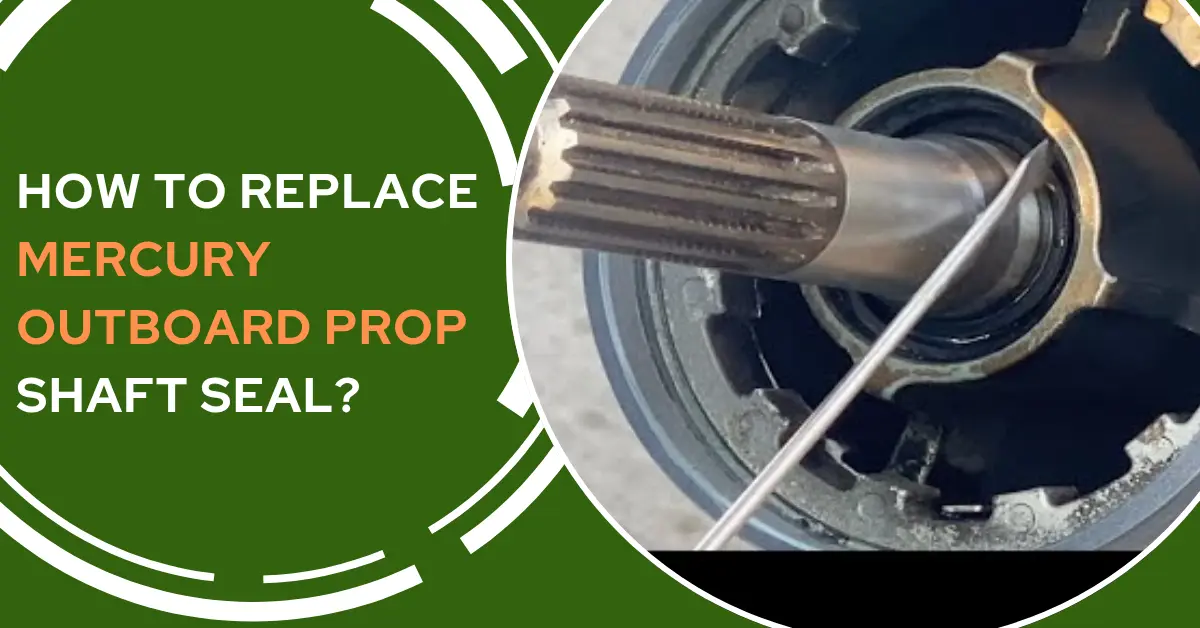
Step 4: Remove Old Seals
Using a seal pick or flathead screwdriver, carefully pry out both the inner and outer oil seals from the bearing carrier.
Take extreme care to avoid nicking the shaft or damaging the bearing housing, as this can cause future leaks.
After seal removal, thoroughly clean the bearing carrier and shaft surfaces. Use a clean rag and marine-safe solvent like Star brite Marine Cleaner & Degreaser to remove any grease, debris, or residue.
Step 5: Install New Seals
Before installing, apply a generous amount of marine grease (such as Star Brite Trailer Wheel Bearing Marine Grease) to the lips and surfaces of the new seals.
Start by pressing the inner seal into place, followed by the outer seal, making sure each is aligned correctly and fully seated.
Using a rubber mallet or a seal installer tool (like the ABN Seal Driver Kit, which helps evenly seat seals without damage) ensures smooth, even installation.
Between the two seals, pack some grease to enhance waterproofing and reduce friction.
Step 6: Reassemble Everything
Slide the prop shaft back into the lower unit. Make sure it moves freely and smoothly. Then, reinstall the bearing carrier and torque the mounting bolts to the Mercury-specified values.
Replace the thrust hub, tab washer, prop nut, and finally the propeller. Double-check that the propeller spins freely with no binding.
Finally, refill the gearcase with fresh, high-quality marine gear oil such as Mercury Quicksilver 75W-80 Gear Lube.
Using a marine gear oil pump like the Quicksilver Lube Pump helps avoid a mess and ensures proper fill.
Post‑Replacement Checks: Ensuring Your Seal Job Was a Success
Here’s how to perform thorough checks to ensure your investment delivers long-term reliability.
1. Confirm the Prop Spins Smoothly and Quietly
With the lower unit reattached, give the propeller a gentle hand spin. It should rotate freely without any wobble, binding, or unusual resistance.
A squeak or grinding noise during this check may signal improper seal installation, a misaligned shaft, or trapped debris. A smooth, quiet spin is a strong first indicator of success.
2. Conduct a Water Test After Initial Run
Start your engine, let it idle in shallow water or a test tank, then carefully observe the prop area and lower unit for any leaks. Perform a full-throttle run for a few minutes, then inspect again once you’ve shut down.
Be on the lookout for oil seepage around the prop shaft flange; even small drips could mean the seal isn’t fully seated or the torque specs were missed.
Pro marine technicians often recommend a pressure/vacuum test to confirm seal integrity.
Using a gearcase tester (Marine Tech Gearcase Pressure & Vacuum Tester), pressurize or draw a vacuum on the lower unit at 6 – 10 psi, rotate the prop and driveshaft, then monitor pressure retention for 30 – 45 minutes.
Staying within 2 – 4 psi of the starting value typically indicates a solid seal.
3. Re-check Gear Oil Level After a Few Hours of Use
After a couple of hours of boating, or after your test, re-open the fill plug and check the oil level and condition.
It should remain clean, with no signs of milky discoloration or water droplet contamination, common signs of hidden leaks or water entry.
Low oil levels or contaminated fluid may indicate the need to re-inspect seals or consider professional pressure/vacuum diagnostics.
Common Mistakes to Avoid During Mercury Prop Shaft Seal Replacement

Here are the most frequent mistakes to watch out for,
1. Damaging the Prop Shaft While Removing Old Seals
Using a screwdriver or sharp tool carelessly can leave scratches or gouges on the prop shaft or bearing carrier housing.
Even a small nick can prevent the new seal from seating properly, resulting in ongoing leaks. Always use a Keze Steel Precision Pick & Hook Set with a rounded tip, and work gently.
Tip: Wrap the shaft with painter’s tape or use a plastic shaft guard while working near it.
2. Forgetting to Refill Lower Unit Gear Oil
It may seem obvious, but it’s shockingly common. After reassembling everything, many DIYers forget to refill the gearcase with fresh marine-grade gear oil. Use Quicksilver High Performance Gear Lube.
Running the engine dry will destroy the gears within minutes.
3. Installing Seals Backward or Misaligned
Oil seals are directional; they must be installed with the correct orientation to function properly. Installing them backwards or even slightly tilted can cause leaks from the start.
Always verify the lip direction matches the original orientation, and press them in evenly using a seal installer or a flat wood block.
4. Reusing Worn or Damaged Parts
Some try to save money by reusing thrust hubs, O-rings, or even seals, but worn parts won’t create a proper seal and can quickly lead to leaks or failure.
Replace old or questionable parts with an OEM Mercury seal kit.
5. Over-Torquing the Bearing Carrier Bolts
Using a power drill or overtightening bolts can crack the aluminum lower unit casing or distort the seal seating surface.
Always tighten to the recommended torque specs found in your Mercury service manual.
Expert Tips & Advanced Advice for Mercury Prop Shaft Seal Replacement
Level up your maintenance game with these pro-approved tips designed for long-term performance and reliability.
1. Combine Repairs for Full Lower Unit Service
Whenever you’re replacing your Mercury prop shaft seal, it’s smart to tackle related maintenance like a water pump or impeller replacement.
These components live in the same area, and opening the lower unit gives full access. Combining these tasks saves time, avoids repeat labor, and extends the life of your outboard engine.
Consider kits like the Quicksilver Water Pump Repair Kit, which work with many Mercury models.
2. Use High-Performance Marine Gear Lube
For boats under heavy loads, in warm climates, or used for racing or towing, high-temp synthetic gear oil can help protect your gearcase.
Mercury’s High-Performance Gear Lube is engineered to resist foaming, water intrusion, and breakdown under pressure.
3. Keep Tools and Seals Clean
Before you start the job, make sure all tools, seals, and working surfaces are clean and free from dirt or corrosion. A contaminated seal, even with a single grain of sand, can cause premature failure and oil leaks.
Store your seal kits in sealed plastic containers or dry toolboxes to protect the rubber from UV exposure, dust, and humidity.
4. Carry Spare Seals for Onboard Emergencies
If you’re far from shore or running in remote areas, a spare prop shaft seal kit and a few basic tools can be a lifesaver.
These parts are small, inexpensive, and could prevent a tow or a ruined weekend trip.
Overview of Mercury Outboard Lower Unit Design
Before diving into a Mercury prop shaft seal replacement, it’s crucial to understand how the lower unit of your Mercury outboard functions.
This part of your engine is responsible for transferring power from the motor to the propeller, and it’s built with precision to handle high loads, water pressure, and rotational forces.
At the core of the lower unit, you’ll find several key components working together to ensure smooth propulsion and gear lubrication:
1. Propeller: The visible part mounted on the prop shaft that converts engine power into forward (or reverse) thrust.
2. Prop Shaft: A long, durable shaft that rotates inside the lower unit, driven by the engine through the gearcase.
3. Bearing Carrier: Holds the prop shaft in precise alignment and houses both the inner and outer oil seals. This part must be removed to access the seals during replacement.
4. Inner and Outer Oil Seals: These circular rubber seals are your first line of defense against water intrusion and gear lube leakage. They sit inside the bearing carrier, sealing the gap between the rotating shaft and the static carrier housing.
This lower unit system operates under extreme conditions: high heat, saltwater exposure, and constant mechanical pressure. Even minor seal failure can compromise the entire drive system.
Models Affected
The design and seal layout are generally consistent across many Mercury outboards ranging from 25HP to 300HP, including both 2-stroke and 4-stroke variants. However, note the following,
1. Smaller engines (25HP – 60HP) usually have compact, integrated bearing carriers and require smaller tools with precision-fit seal kits.
2. Larger engines (75HP – 300HP), like the Mercury Verado series, often need heavy-duty pullers, special installation tools, and larger, dual-lip seals for optimal sealing under higher torque loads.
Always match your seal replacement kit to your engine model and year.
Frequently Asked Questions (FAQs)
1. How long does Mercury prop shaft seal replacement take?
For most DIYers, this job takes 1 to 2 hours based on skill level, tools available, and whether the bearing carrier is stubborn or corroded.
2. Can I run my boat with a leaking prop shaft seal?
Running your boat with a leaking prop shaft seal is not recommended. A leaking seal can allow water to enter the gearcase and lead to milky oil, corrosion, and catastrophic gear failure, often requiring a full lower unit rebuild.
3. What if I don’t have a seal installer tool?
You can carefully use a deep socket that matches the seal’s outer diameter. Just ensure it’s centered and apply gentle, even pressure.
4. Is this process the same on 2-stroke and 4-stroke Mercury outboards?
Mostly yes. The core steps remain the same, but seal kits and torque specs may differ slightly by model year and engine type. Always verify your part number.
5. How do I know which seal kit fits my Mercury outboard?
Match your engine’s HP, year, and serial number to the correct OEM or aftermarket part number. Sites like Mercury Marine’s official parts lookup, SEI Marine, or Amazon can help.
6. Why is my lower unit oil milky?
Milky or gray oil means water has entered the gearcase, likely due to a damaged seal. Immediate attention is needed to prevent rusted gears and bearings.
7. Do I need to remove the prop shaft during this process?
Not always. Some mechanics leave the shaft in place and remove seals using a pick or screwdriver. However, full removal allows better inspection and a cleaner seal installation.
Final Thoughts
Replacing your Mercury prop shaft seal may seem difficult at first, but with the right tools, a quality seal kit, and a bit of patience, it’s manageable.
Taking on this repair yourself can save you $200 – $500 in labor costs and help you better understand your outboard’s internal systems.
By replacing a worn seal early, you prevent water intrusion, protect your gearcase internals, and ensure smooth, reliable propulsion for seasons to come.
Always consult your Mercury service manual for model-specific torque specs, part numbers, and lower unit procedures. No two motors are exactly alike!
Best of luck with your next water adventure!